I finally pulled the trigger and got myself a resin 3D printer for wargaming.
I’d been thinking about getting one for a while, and now that they’re at the point where 3D printed wargame miniatures are practically indistinguishable from sculpted and cast ones, I figured this was the time. Plus, resin 3D printers have never been cheaper.
And man, it’s kind of magical. It’s like having a Star Trek replicator for toy soldiers (and you can even 3D print Star Trek toy soldiers with it. Very meta!).

But it was definitely a learning curve (and still is!) to get everything setup and working well, with lots of failures and mistakes along the way.
I’m a weirdo who does way too much research for any purchase over $100, and 3D printing was no exception. I spent a ton of time reading guides, watching YouTube videos, and compiling reviews before even deciding on a resin 3D printer model, let alone attempting my first print.
But there were still a ton of things I only learned by doing after I already had the printer. So I figured I’d write up everything I’ve learned so far and the resources and guides I’ve found the most helpful for other newbies in the hobby who want to 3D print plastic soldiers.
If you’re in the hobby and looking to get into resin 3D printing for wargames, hopefully my experience can help you.
Affiliate Disclaimer: If you buy something using links from this page, I may earn a few pennies at no additional cost to you.
Table of Contents
Choosing a resin 3D printer for wargaming
While there is no single best 3D printer for wargames, as I said above, I did a ton of research before picking the printer I did.
I decided to go with an Elegoo Mars 2, which cost me about $200.

The Elegoo Mars 2 is the best resin 3D printer for wargaming I could find. It nicely mixes low cost, high-quality, and good customer service.
Several factors influenced my decision, including price, print quality, customer service, and community around the printer.
I went for the Elegoo Mars 2, instead of the newer Mars 2 Pro (or the soon-to-be-released Mars 3) because the added stuff on the 2 Pro (a built-in charcoal filter, slightly bigger build-plate, and metal instead of plastic vat) weren’t worth the extra $70 to me. The filter supposedly is very poorly designed and is built integrally so it’s very difficult to replace once it’s been used up, and the plastic vat that comes with the regular Mars 2 is very sturdy and thickly built and I haven’t once regretted not having a metal one.
In terms of general principles for selecting a printer, ideally you should get one that has a monochrome LCD screen (not a colored one) as the mono LCD screens last longer, and print faster than the older color screens.
A higher resolution screen is typically better, but you pay for it. I went with a 2K resolution printer, even though there are 4K and now even 8K ones out there, because it was so much cheaper (and honestly, my prints are so detailed I don’t know if my eye could pick out the difference between a 2K and a 4K print).
Elegoo, Anycubic, Epax, and Phrozen seem to be the main companies in the resin 3D printing space, and I went with Elegoo because I read stories on Reddit and elsewhere of them having better customer service than Anycubic (and their products were cheaper than Epax or Phrozen at the time I was looking).

There also seemed to be a good community around the Elegoo products both on Reddit and Facebook, which I figured would be helpful in troubleshooting any problems I might have.
Plus, while I’m not saying it’s the absolute best 3D printer for wargames, I saw some great wargaming resin prints coming from the Elegoo Mars range of printers, like those on the Toy Soldiers off to War blog, or the Idle Hands Workshop blog.
I ordered from Amazon because I’ve also read stories of printers showing up damaged, and I wanted an option to return it for a new one or a refund if that happened to me (it didn’t!).
I also added in a bottle of Elegoo’s ABS-like gray resin which seems to be used by a lot of people even if they don’t have an Elegoo printer.
I’ve heard good things about Siraya Tech resins like their fast ABS-like, and their stronger “Tenacious” resin (which some people mix into regular resins to add strength to finished prints), as well as the newer, flexible, and designed specifically for tabletop miniatures (but much more expensive) AmeraLabs TGM-7 resin, but I haven’t tried anything beyond my first bottle of resin yet.
After you buy the printer and resin you’re not done yet, because uncured resin is toxic and there’s a whole process for handling it and cleaning and curing finished 3D wargame prints.
Additional things to buy for resin printing
In terms of the printing process itself, you do need a fair amount of “ancillary” items to clean and cure a resin print safely. I did a lot of research on this and the list of things I bought, in addition to the printer are:
- Cheap plastic tablecloths/covers for the table you plan to use
- Nitrile gloves (medium duty)
- 99% isopropyl alcohol (IPA) to clean the prints (I actually use 90% since Walgreens doesn’t carry 99%, and it’s fine. Others get away with 70% plus a longer cleaning time.)
- Safety glasses
- N95 masks or a respirator with filters
- Lots of paper towels
- Microfiber cloths to cut up and clean the vat with if you have a failed print
- Tin foil roasting trays or cafeteria trays (1 wide for printer to sit in and catch any spills, 2 deep ones for used tools/as a workspace for removing print supports)
- 2 pickle jar containers with inner basket to clean and agitate print in IPA
- 2 clear tupperware tubs, 1 for cleaning, 1 for curing (if planning to cure outside)
- Paint strainers/filters (the Mars 2 came with these)
- Metal scraper to remove prints from printing bed and flush cutters/clippers to remove supports (the Mars 2 came with both of these)
- Silicone spatula to clean vat
- Old toothbrush for cleaning prints
- Big funnel for getting resin back into bottle and IPA back into bottles
- A bottle of 3D printing “photopolymer” resin, obviously (as mentioned above I use Elegoo ABS-like gray)
Because I live in a sunny place and cure my prints outside in the sun I didn’t opt to buy cheap UV lamps or a nail drying station, but for folks in the UK or other cloudy locales it might make sense to get one of those as well.

I should note the need for a few of the above items can be obviated if you buy one of the branded wash and cure stations put out by the 3D printer manufacturers themselves. For instance this $150 one from Anycubic or this $100 one from Elegoo. I opted to save the cash and do it myself, but if you’d prefer a less DIY route these are good options.
Setting up your resin 3D printer
The actual set-up for my printer was much easier than I anticipated.
You’ll want to make sure you situate the printer in a room with some ventilation, and ideally without any direct sunlight (or with blackout shades you can close when the printer is open). You’ll also want some decent walls as the printer is somewhat loud when it’s running.
I put mine in a room in our unfinished basement and tacked some cardboard over the single window in there to prevent any sunlight from accidentally curing resin when the printer is open.

Once you’ve got everything unboxed and plugged in, the first thing you need to do is level your build plate, which is a super simple process that just makes sure your build plate (the thing that lifts out of the resin vat and actually holds the prints) is flat against your LCD screen.
The included manual (despite the poor English translation from Chinese) is actually pretty good at describing the process, but I also watched how to do it in this video just to make sure I had a good handle on it:
Next you’ll want to download a slicer software that will turn 3D model files (typically in .STL format) into files the printer can read (and that tells it at what times and for how long to turn on the LCD screen to cure the resin in the vat).
The two main software programs seem to be Chitubox and Lychee. Both have free versions, and both do pretty much the same thing. I’ve heard Lychee has better auto-supports but that its free version makes you watch ads.
I use Chitubox, which is Elegoo’s own software (but which works with all other resin printers).
Setting up Chitubox for your printer and resin is pretty simple, but not intuitively obvious, so here’s how I did it, in pictures:
Step 1. Open Chitubox and click the gray “Settings” button on the right-hand side, then click the “add new printer” button on the top left of the box that opens (it looks like a little piece of paper with a plus sign in it).
Step 2. Select your printer from the drop-down list. If you downloaded the most up-to-date version of the software pretty much all different printer brands and models should be listed.

Step 3. Then click on the “Resin” tab (ignore the “Machine” tab, that should all be pre-filled out based on your printer model) and enter the information about the current resin you’re using into the appropriate boxes. The resin density should be listed on your bottle of resin, and hopefully you know what you paid for it as well to enter the cost (this helps the program compute the cost of each print, so you can gloat about how much money you’re saving when that $100 Forgeworld model ends up costing you $5.67).

Step 4. Next click the “Print” tab. Don’t worry, this is overwhelming at first but you’ll spend enough time in here making tweaks (especially if you switch resins) that you’ll learn what most of these things are. But, briefly the ones that are important to know right now are:
- Layer height is how thick each layer of your print is. Think of it almost like resolution on a computer screen: the smaller the layer height the more seamless and less “pixelated” the model appears.
- Exposure time is how long the LCD screen is turned on per layer to cure the resin. Mono LCD screens can cure the resin faster than color ones and so don’t need to be on as long. A good rule of thumb for a mono is 1.5-3 seconds is a good range. Going higher than that may result in over-curing and cause your wargame model to lose detail.
- The other settings I haven’t messed with yet, but lift speed is one that is constantly mentioned in forums as a way to fix prints that are failing (a slower lift speed will make it less likely your print will “rip” off the build plate accidentally).
- Here’s a good guide explaining the different settings in more depth.
While you can copy my print settings, below, it may be worth printing off a resin exposure finder to really nail down how long your exposure time should be. NOTE: I did not do this and still get prints that I am perfectly happy with, so I’d consider it optional.

You can also use a guide like this for settings with different resins:
This is Elegoo-specific, but most printer companies will have their own version of this sheet you can find on their websites with a little searching.
And now you’re basically ready for your first print!
How to resin 3D-print your first wargame model
A lot of people, and the printer companies themselves, will tell you to print the test model provided by the printer company as your first print.
Screw that.
My first prints were Warhammer 40k Imperial Guard proxies because that’s the type of model I intended to use the printer for. I learned more about the actual settings and process for the models I wanted to print doing that than wasting time with a corporate test print model I’d just end up throwing out anyway since I had no use for it.

So first steps, finding a model to 3D-print.
Where to get 3D print models for wargames
There are a ton of places online to get both paid and free 3D wargame models to print. Because there are so many great, free models out there I’ve mostly used those, but I have paid for some sets as well (like Davikdesigns’s great Arcadian Veterans), but be aware it will generally take more time finding free models than simply paying for something if you have a specific item in mind you want to print.
Some great places to find wargame models to 3D print include:
- https://www.thingiverse.com/
- https://www.wargaming3d.com
- https://cults3d.com/en/
- https://www.myminifactory.com/
- https://www.cgtrader.com/
- http://3dmag.org/en/
- https://sketchfab.com/3d-models/
- https://thangs.com/
- https://www.prusaprinters.org/
- https://theminiindex.com/
- https://www.patreon.com/search?q=3d+print
- https://makerfun3d.com/patreon-game-terrain-miniatures
- https://www.stlgrid.com/
- https://www.yeggi.com/
- https://stltop.com/
This is by no means a comprehensive list, and beyond the big aggregation sites there are tons of little individual stores like 2nd Dynasty and Giorgio Donato’s amazing free Halo and Star Wars models hosted on eCommerce platforms like Gumroad or just on their own websites. These are a little harder to find, but joining 3D printing Facebook groups or other online communities like Reddit’s /r/PrintedMinis will help you find them when they do pop up.
Once you’ve downloaded an .STL file or two, it’s time to get it supported for printing!
Adding supports to your 3D print models
This part of resin 3D printing is probably my least favorite since it seems to take the most time, but there are some things you can do to minimize the pain of supporting your models.
The first is learning the basics of what supports are meant to do, and how they work.
I’ll be honest, everything I know about 3D printing supports I learned from the YouTube videos of 3DPrintingPro and if you’re just getting started out I highly recommend you start with his basic introductory video series, the first one of which is here:
Essentially, supports serve two purposes when 3D printing:
- Prevent any “islands” (areas on a 3D model that aren’t connected to the rest of the model and so could result in floating blobs of cured resin in your vat) from forming.
- Hold the model in place on the build plate and resist the suction force when the plate pulls upward off the curing screen (known as the FEP).
What that means is you want heavy supports at the bottom of your model, especially around the first little areas where the resin is cured, and then you want some light and medium supports on any islands to connect them.

In addition to knowing where, how many, and what type of supports to place, a good understanding of model orientation is also important when prepping your model for printing.
Most advice is to orient your model at a 30-45 degree angle from the vertical, but from my own experience, and the experience of people like 3DPrintingPro, 10-15 degrees is usually more than sufficient.

Having a smaller orientation angle means you need fewer supports on the backside of the model where support pockmarks will be visible once removed and ruin the look of the model, and it also means a smaller horizontal cross-section on the build plate. This latter fact means there’s less suction force on the model when the build plate pulls upward off the FEP, and so the risk of the model separating from itself or from the build plate is lower.

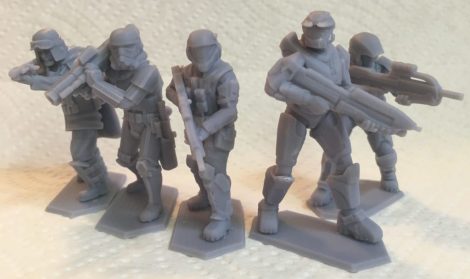
In fact, I’ve had successful prints of soldiers oriented almost vertically, with just the slightest angle introduced to prevent the bottom of their feet from curing all at once and forming islands (see image below).

This also meant most of the support pockmarks were on the bottom of the figure’s feet, where, once glued to a base, they won’t be visible at all. As opposed to along their back and butts.
Once you’ve got supports added to your models, click the big blue “Slice” button on the right and wait for the software to turn the 3D model into one that can be read by your printer. You can then save the resulting file to any old thumb drive (I didn’t use the one that came with my printer because I didn’t want to insert a random thumb drive from communist China into my laptop…) and walk on over to your printer.
Actually resin printing your 3D wargame model
This part is pretty easy:
- Put on your protective gear (nitrile gloves, safety glasses, and N95 mask).
- Add resin to the printer after shaking the bottle vigorously (I do 60 seconds minimum). Chitubox will tell you how many milliliters to add based on the size of the print but I honestly just eyeball it.
- Insert the thumbdrive.
- Click the file on the printer touchscreen and click “print.”
- Close the top of the printer and wait! My prints usually run anywhere from 3 hours (for 28mm figures) to 7+ hours (for 54mm figures and vehicles).
A couple random lessons from the actual printing process:
- Give the print a few minutes, then come back and listen for a “sucking” sound when the build plate lifts off the FEP. This sound is a good thing! It means the print is curing and being pulled off the FEP as intended. Here’s a video of what it should sound like.
- Don’t pause the print if you can help it, even if you need to refill the vat for a particularly large print. Instead, just pour the resin in while the print’s going (try and time the pour for when the build plate is moving upward if you can). This guide on how to refill a vat mid-print from Phrozen is applicable to just about all resin 3D printers.
- You can leave resin in the vat for weeks/months (as long as your printer’s cover is on to prevent the resin from curing!) and still print just fine after stirring it for 30ish seconds (or until it’s a uniform color again).
Once your prints are done it’s time to get them cleaned and ready for the tabletop!
How to wash and cure 3D-printed resin wargame models
The 3D print post-processing step is actually fairly straightforward, despite all the complaining about it online. But there are a few things that can trip up newcomers (and that I messed up my first time).

When you’ve got your finished print, all shiny and fresh and dripping resin from the build plate, here’s what to do next:
- Put back on your protective gear (nitrile gloves, safety glasses, and N95 mask).
- Remove the build plate and use the metal scraper to pop the finished prints into a high-walled tin foil tray (this sometimes requires some force).
- Plop the prints (supports and all) into the first pickle jar filled with IPA and swish them around for a good minute.
- Then plop them into the second pickle jar of IPA and swish them around for another minute and use the toothbrush to scrub them just to make sure the last of the wet resin is off. The toothbrush step is important as otherwise you can get a white, chalky film of resin residue after curing that can ruin detail on the model.
- Next, plop the prints into a tupperware tub filled with scalding hot water (no need to boil it, just use the hottest tap water your sink can provide) to soften them a bit to make taking the supports off easier. This was a key lesson for me after my first print where I didn’t do this and it took me 30 minutes, lots of cursing, and liberal use of flush cutters to remove the recalcitrant supports (and left lots of visible pockmarks on the model).
- Pop the supports off with your fingers. They should peel right off, but you can also use the flush cutters to get at any stubborn ones and to clean up any supports that don’t fully come off.
- Pop your prints back in the water-filled tupperware container (see here for why water curing is best), set it on a sheet of aluminum foil out in the sun for 2-3 minutes to cure (occasionally turning the models over with a stick) et voila!

And now you’ve got some finished, 3D-printed wargame models to get primed and painted for the tabletop!
Additional 3D printing resources and guides for wargamers
There are some other good general guides, FAQs, and resources I chanced upon while learning about resin 3D printing for wargames, and figured I’d share them below.
- A helpful chart for rescaling your models for common wargaming scales.
- “Sir Scalesby:” a free 3D model for eyeballing scale in your 3D software of choice.
- Another good resin 3D printing guide similar to mine.
- A good source for guides and articles on 3D printing.
- For the truly advanced 3D printer, a video on how to rip models from video games and 3D print them.
And there you have it! Everything I’ve learned about 3D printing wargames figures in resin.

Hopefully this guide was helpful, and please leave any questions you have in the comments and I’ll do my best to answer them.
The Elegoo Mars 2 is the best resin 3D printer for wargaming I could find. It nicely mixes low cost, high-quality, and good customer service.


Thanks a lot, this is a massive help!
I want to print in 1/72 scale with legion scale STL’s, so I know they will need reducing to get the correct height, but what else needs to change? Would the layer size be different for example?
Any help is appreciated
Thanks!
Dave, glad it’s helpful! Yes you’ll want to reduce the scale, but layer size shouldn’t need to change, at least in my experience. It’s sort of similar to reducing the size of an image on your computer screen: the screen resolution doesn’t change. You always *can* reduce the layer size, though this will increase print time for, to my eye, not much improvement in detail.
Thank you for this. I have been printing for about a month now and I’m constantly learning new things. I ruined my screen once but not cleaning my fep/vat well enough between prints so I’d encourage you to add a note about that. A replacement screen is about$30 and takes about 5 minutes to replace but good maintenance will stop that from happening.
Thanks again,
GS Steve
Good point! Yes I’ve tried to be very careful about cleaning the vat after any print fails, even if they look minor, in case there is any cured resin floating around that could get pushed up against the LED screen and ruin it on the next print.
I cannot stress how this guide is helpful for newcomers, especialy those who want to print WH 40k armies. Hopefuly this will get more attention.
I would like to ask you roughly how much miniatures (like those warhammer or halo) can you print with a single bottle of resine?
Lucas, thank you! Glad it’s helpful. As for how many minis you can print with a single bottle of resin, I’ve managed to print (so far): ~40 28mm figures plus bases, 2 heavy weapons (lascannnons), 1/2 of a walker (sentinel proxy), and ~30 54mm figures and I STILL haven’t used up my first bottle of resin. And that’s not even counting the failures I’ve had to discard. So I think you could easily print a full 2,000-3,000 point WH40k army on a single bottle of resin.
Great write up! Appreciate all the links as well. Any luck finding free stls for things like 40k and Bolt Action? I got my AnyCubic Mono on a good holiday sale and I’m just waiting on the last of my protective gear to show up so I can print! Got plenty of battletech stls to get me started.
Thanks! And yes there are tons of STLs for both! Depends on what you’re looking for. Lots of free WW2 vehicles on Thingiverse, and tons of 40k proxy STLs both free and paid for pretty much every army out there.
[…] while I have a resin 3D printer and could have spent a couple days printing up opposing forces for the game, I figured I already […]